

A sundial is forgiving of many things: weather, style, a slightly uneven garden. Shade is different. The difference between a dial that delights and one that disappoints is usually decided before the first screw goes in. Walk the site at different times of day, watch how shadows move, and check the practical details below. Eight checks, done in order, will save you from drilling holes in the wrong place or setting a beautiful dial where it can never tell the time.
The Eight-Point Pre-Mount Checklist
Keep these eight checks together. The sections that follow explain how to handle each one without overcomplicating the job.
- Measure direct sun across the day and across seasons. A bright garden is not the same as a sunny dial.
- Note every obstruction, including future growth. Trees, hedges, fences, and buildings all cast shadows that move.
- Match the dial to your latitude and mounting type. A horizontal dial made for another region may never read correctly.
- Choose a surface that is solid, level, and well drained. Loose posts and hollow walls will let you down.
- Confirm true north or true south, not magnetic north. Orientation is the dial’s whole method.
- Set the dial at a comfortable reading height. You should not have to stoop, climb, or cast your own shadow.
- Anchor it against wind, frost, and accidental knocks. A garden dial is an outdoor object, not a shelf ornament.
- Clear the area of trip hazards and fragile edges. Safety around the dial matters as much as accuracy.
Sunlight and Obstructions
Start with a full day on site, not a quick glance from the kitchen window. A garden can feel bright and still leave a dial in shade for the hours that matter. Use a bright day and check the spot at mid-morning, midday, and mid-afternoon. Take phone photos at each hour; shadows are easier to compare later. If you can, repeat the exercise in a different season, or at least think through the year: a low winter sun casts longer shadows, while summer foliage can close a gap that looks open in spring.
What counts is direct sunlight falling on the dial face. Bright reflected light is not enough to cast a clean shadow. A reasonable target is at least six hours of direct sun, ideally including the middle of the day, when the sun is strongest and the shadow is easiest to read. If your dial is a wall-mounted type or one designed for a limited hour range, adjust that expectation to the hours the dial is meant to show.
Look up, sideways, and ahead
Obstructions are not only buildings. Check hedges, fence posts, pergolas, hanging baskets, satellite dishes, and the neighbor’s tree that leans over the fence. Then look ahead: a young shrub can become a shadow-caster in a few years, and a planned extension or shed may change the light. If a branch is the only problem, trim it before mounting rather than after. If the obstruction is permanent, move the dial or choose a different mounting position; no amount of adjustment will make shade into sunshine.
Mounting Surface and Orientation
A sundial needs a surface that will not move, flex, or hold water. Stone, brick, concrete, and a well-set timber or metal post can all work. A loose fence panel, a hollow garden wall, or soft ground that settles after rain will not. Tap the surface and look for cracks, hollow patches, or crumbling mortar. For masonry, use fixings suited to the material, and if the wall is old or load-bearing, ask a builder before drilling. A pedestal should sit on a firm footing, with drainage so water does not pool around the base. In cold gardens, frost can lift a poorly founded base; set it deep enough for your local conditions.
Level matters
For a horizontal dial, the plate must be level in both directions. A small tilt is easy to miss by eye and can shift the shadow noticeably. Use a spirit level on the dial plate or on the pedestal top, check front-to-back and side-to-side, and recheck after tightening fixings. If the dial has adjustable feet or a mounting collar, make the final leveling after it is in place.
True north, not magnetic north
In the Northern Hemisphere, a horizontal dial’s gnomon should point to true north; in the Southern Hemisphere, to true south. A compass points to magnetic north, which is not the same thing, so do not rely on a phone compass alone. Align the dial’s noon line with the true north-south meridian, following the maker’s instructions for your model. Also check that the dial was made for your latitude. On a horizontal dial, the angle of the gnomon is tied to latitude; a dial bought for a different region may never read correctly. Wall-mounted dials have their own orientation rules, so confirm the required wall direction before you commit.
Height, Stability, and Safety
Place the dial where you can read it comfortably without stooping or climbing. A plate roughly at waist to chest height suits most standing adults; a lower setting can work for children or a seated viewing area, provided the dial still catches sun. Stand in the likely viewing spot and check that your own shadow does not fall across the face. Make sure the dial is not so high that it becomes a maintenance problem or so low that it disappears under plants.
Wind, frost, and knocks
A garden dial is exposed. A heavy pedestal helps, but it still needs a stable base and, where appropriate, bolts or anchors. Avoid mounting on a gate, a lightweight fence, or a post that moves when leaned on. Check that the fixings are corrosion-resistant for your climate and that water can drain away from the base and the dial plate. If the dial is in a windy spot, test the mount before final tightening; a wobble that seems minor on a calm day can become a rattle in a storm.
Keep the area safe
Look at the route around the dial. Is it beside a path where someone might clip a knee? Does it sit at the edge of steps, a patio, or a pond? Keep sharp corners and projecting gnomon tips out of the main walking line. If children use the garden, check that the dial cannot be pulled over and that the base has no tempting footholds. In a shared or public garden, follow any local rules about fixing objects to walls or ground. Safety is mostly about ordinary use: can someone walk, play, or mow around it without a surprise?
What to Do on Installation Day
Set out the dial and fixings before you drill. Mark the position lightly, then check the light again with the dial in place; the plate itself can cast a shadow you did not notice during planning. If two people are available, have one hold the dial while the other checks level and orientation. Fix it temporarily first, then test the shadow at a time you can verify. Do not fully anchor a dial until you are satisfied with its reading position and the plate’s level.
- Clear the surface and check the footing or wall for soundness.
- Mark the fixing points, then drill only after confirming there are no hidden pipes or cables.
- Set the pedestal or bracket, check level, and tighten gradually.
- Mount the dial, align the noon line to true north or south, and recheck level.
- Observe the shadow over an hour or two; adjust before final anchoring.
- Apply any recommended protective finish and clean the dial face with a soft cloth.
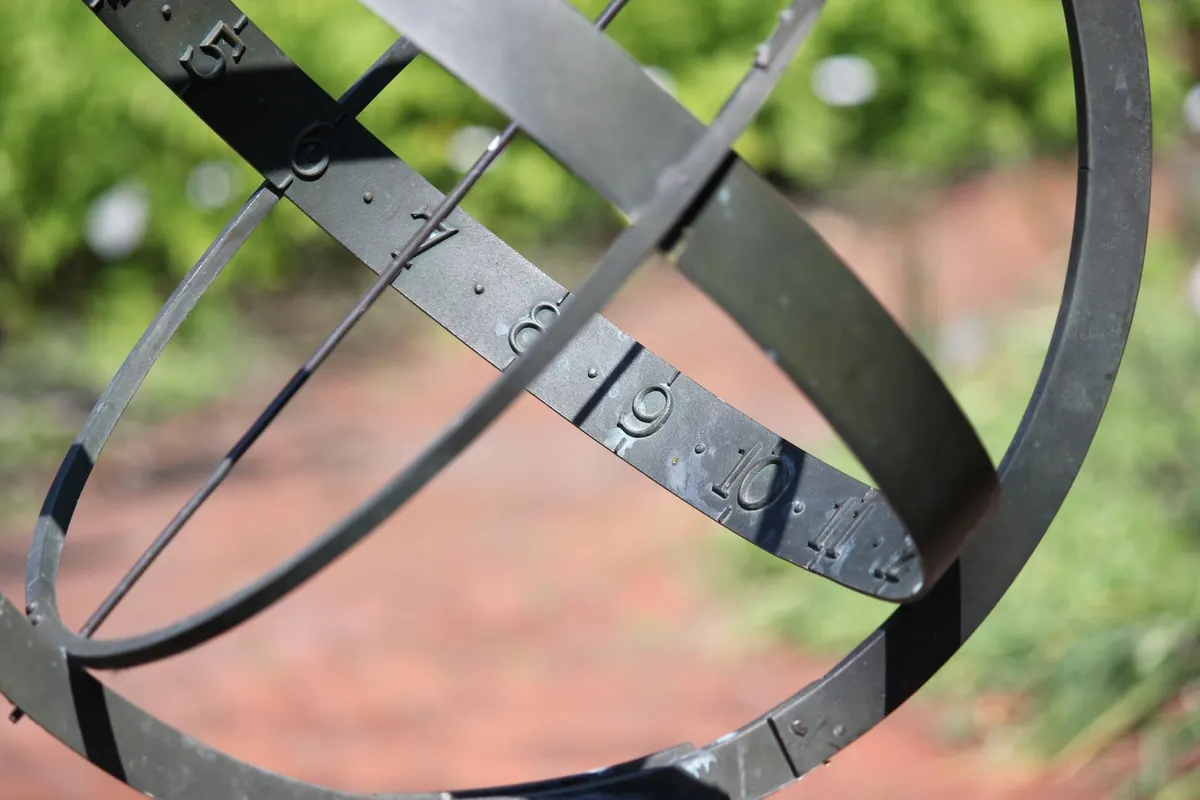
If the dial has a motto, an engraved number, or a decorative border, make sure it faces the viewer as intended. A dial can be technically correct and still look wrong from the main approach to the garden.
A Last Look Before the First Noon
Leave the final anchoring for a day when you can return at a different hour. Check that the base has not settled, that fixings are still snug, and that no new shadow has appeared from a moved pot or an overgrown branch. A sundial rewards a slow start: a stable base, a clear sky window, and a true north-south line will do more for its accuracy than any clever adjustment later. Once it is set, keep the face clean and the surrounding plants trimmed. Then let the garden do the rest.
Photo: Rene Terp / Pexels